
How to Use the Belaroq Ring Sizer: Step by Step
This tutorial walks through the online ring sizer one method at a time, with exact steps for the screen, the paper strip, a known diameter, the AI photo estimate and the printable version. Work through whichever method matches what you already have, then confirm the result before production.
Calibrate once, match carefully, and confirm the result before production.
The most reliable home measurement is a calibrated screen or printed circle matched against a ring you already wear, followed by a production size confirmation with Belaroq for non-resizable pieces.
Ring sizer at a glance
- Every screen displays pixels at a different scale, so the sizer calibrates with a bank card before measuring.
- A bank card follows the ISO/IEC 7810 ID-1 standard at exactly 85.6 × 53.98 mm, which makes it a reliable scale reference.
- The ring method matches the inner edge of a ring you own against an on-screen circle, in 0.1 mm steps.
- The paper-strip method measures your finger's circumference and converts it to US, UK, EU and JP sizes instantly.
- The AI photo estimate uses the card in your picture as a scale reference and always shows a size range, not a single size.
- The printable sizer is physically exact because PDF points map to printed millimeters when the file is printed at 100%.
- Finger size shifts through the day: measure in the evening at room temperature for the most stable result.
Choose the method that matches what you have
Start by listing what is already in front of you. If you own a ring that fits the intended finger, the ring method is the fastest and most accurate. No ring? Use the paper strip. You may also know a measurement already, or prefer printing a physical sizer instead of measuring on a screen.
For help reading the result in every sizing system, the full size guide explains US, UK, EU and JP standards and how fit should feel.
| What you have | Method to use | Accuracy |
|---|---|---|
| A ring that fits the intended finger | Ring on screen | Highest — matched to a known fit |
| No ring, a printer at hand | Printable sizer PDF | High — physically exact when printed at 100% |
| No ring, no printer | Paper strip on the calibrated ruler | Good — depends on strip placement |
| A measured diameter or circumference | Direct entry | Exact for the measurement entered |
| Only a photo of a ring next to a card | AI photo estimate | Rough — shows a range, then confirm |
Method 1 — Measure a ring you own
Open the ring sizer and choose the first method. This method needs no printer and works on a phone, tablet or desktop.
Wide bands sit tighter than narrow ones, so if the ring you measure is noticeably wider than the one you plan to buy, consider half a size up and confirm with our production team before ordering.
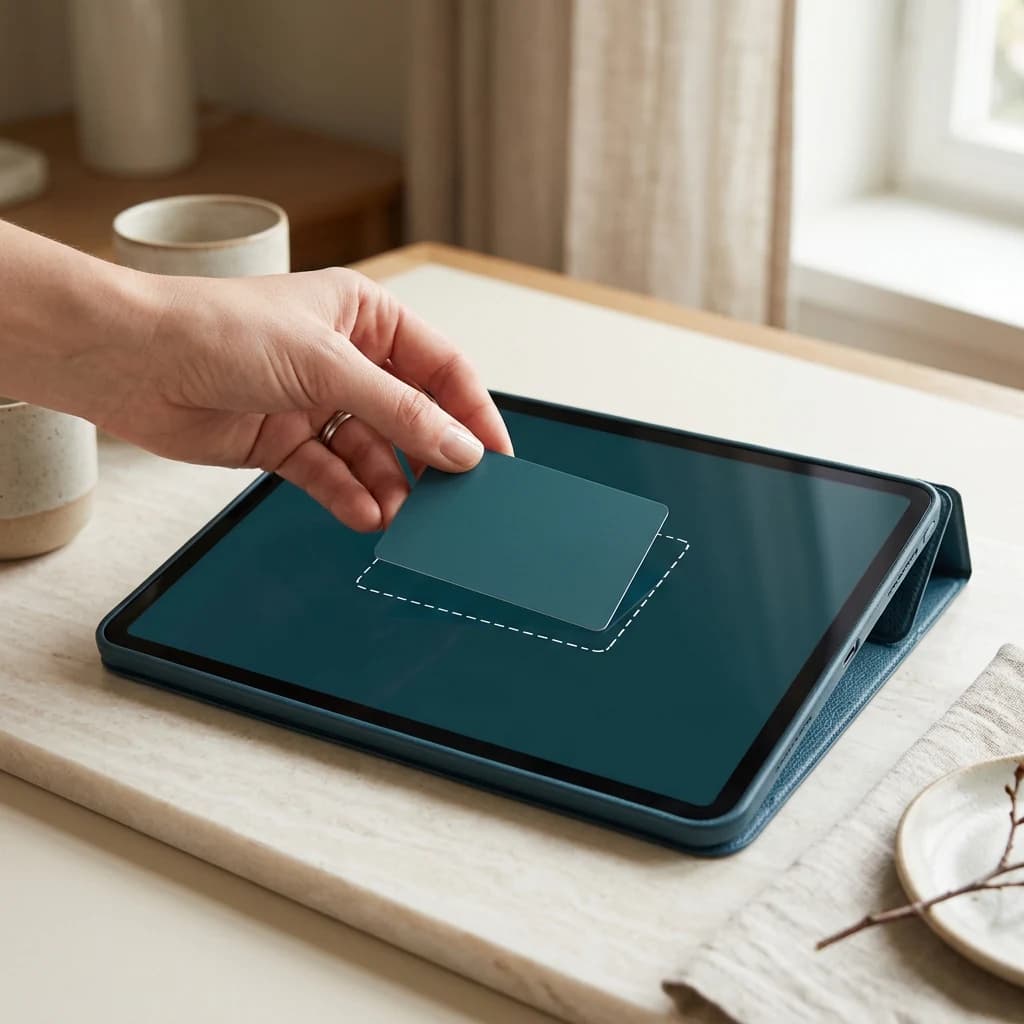
- Step 1 — Calibrate: lay a bank card flat on the screen and adjust the outline with the − and + buttons until it matches the card exactly. The calibration is saved on your device for future visits.
- Step 2 — Match: place the ring you own on the screen and adjust the circle until its inner edge lines up with the ring's inner edge, in 0.1 mm steps.
- Step 3 — Read: confirm the live estimate and open the result card, which shows your US quarter size plus UK, EU and JP conversions, diameter and circumference.



Relative visual scale only. Physical on-screen size depends on the device; the written measurements and the individual stone report take precedence.
Method 2 — Measure with a paper strip
No existing ring? Cut a strip of paper about 5 mm wide and at least 80 mm long. The sizer's calibrated ruler turns that strip into a circumference reading, and the result converts to every size system automatically.
Prefer a pre-printed tool instead of a screen ruler? The printable sizer includes cut-out paper strips and is physically exact when printed at 100%.
- Step 1 — Calibrate the screen with a bank card, exactly as in Method 1.
- Step 2 — Wrap the paper strip around the base of the finger and mark the point where the strip overlaps itself.
- Step 3 — Flatten the strip against the on-screen ruler and drag the marker to the overlap mark; the live size updates as you move it.
- Step 4 — Confirm the result. Measure in the evening at room temperature, because fingers swell with heat, exercise and salt.

Method 3 — Enter a known diameter or circumference
If a jeweler or an existing piece gave you a diameter or circumference, skip the screen entirely. Enter the number, choose millimeters or inches, and the sizer returns the size immediately.
Not sure which number is which? The conversion chart shows both columns side by side, so you can match any measurement to the right row before entering it.
- Step 1 — Choose diameter (straight across the inside of the ring) or circumference (all the way around the inside).
- Step 2 — Enter the value and pick mm or inches.
- Step 3 — Read your size in US, UK, EU and JP, with the quarter-size step applied automatically.

Method 4 — AI photo estimate and the printed-sizer check
Two AI-assisted options cover the remaining cases. The photo estimate approximates a size from a picture of a ring beside a bank card; the printed-sizer check reads the matching circle from a photo of the printed page.
The photo estimate carries about ±2 mm of uncertainty, which is why it shows a range rather than one size. For the details of how the AI works and what it does not guarantee, see the AI disclosure.
- Photo estimate — Step 1: lay the ring flat next to a bank card and photograph both from directly above. Step 2: upload the photo on the AI photo tab. Step 3: read the range, then confirm with Method 1 or 2.
- Printed check — Step 1: print the sizer at 100% and verify the 100 mm bar with a physical ruler. Step 2: place your ring on the circles. Step 3: photograph the page and let the AI read the matching label.

Before production: confirm the size
A careful measurement is the first half of the job; the second half is confirming it in the right context. Wide bands feel tighter, certain fingers swell more than others, and how the setting is built can change how a ring sits on the hand.
If your result sits between two sizes, choose the larger for comfort. Belaroq also confirms the production size on request, includes free resizing, and the 60-day return policy covers sizing mistakes, so a wrong guess never becomes a permanent problem.
Editorial illustration created for Belaroq with Gemini 3.1 Flash Image via APIYi.
Ring sizer questions, answered
Quick answers to the questions that come up while measuring.
Why do I have to calibrate the screen with a bank card?
Every screen renders pixels at a different scale, so an uncalibrated circle would be a different physical size on every device. A bank card has a standardized ISO size, which lets the sizer convert screen pixels into real millimeters on your device.
Which method is the most accurate?
The ring method and the printable sizer, because both compare against a known physical reference: a ring that already fits, or a printed page at exact scale. The paper strip is a close second, and the AI photo estimate is deliberately approximate.
Does the ring sizer work on my phone?
Yes. Open the page in your phone's browser, calibrate with a bank card, then place your ring or paper strip directly on the screen. Calibration is saved for that device.
What time of day should I measure?
In the evening at room temperature. Fingers are usually smallest in the morning and after cold, and largest after exercise, heat or salty meals, so evening gives the most stable reading.
What if I am between two sizes?
Choose the larger size, especially for wide bands of 6 mm or more, which feel tighter than narrow ones at the same size. Belaroq confirms the production size on request.
Do I still need to confirm my size with Belaroq?
For non-resizable pieces and custom orders, yes: share your measurement and the finger you plan to wear the ring on, and the team reviews the best production size before manufacturing.
Is the printable sizer as accurate as a jeweler's tool?
When printed at 100% and verified against the built-in 100 mm bar, the printed circles are physically exact. The difference from a jeweler's mandrel is mainly measurement technique, not the tool itself.
What if the delivered ring does not fit?
Belaroq includes free resizing, and the 60-day return policy covers sizing mistakes. You never have to live with a ring that does not fit comfortably.
The practical takeaway
Match the method to what you own: ring on screen if you have one, paper strip if you do not, direct entry if you know the number, and the printable or AI options when you prefer paper or photos. Calibrate once, measure in the evening, choose the larger size between two, and let the resizing policy remove the risk. A confirmed size is the final step before production.